Final Piece Evaluation
My final Piece is a virtual reality environment version of Salvador Dalí's famous painting - The Persistence of memory. I did this by drawing out the different angles of all the objects in the painting, then 3D modelling them and texturing them with photoshopped images taken directly from the painting to ensure accuracy. I then built the environment in unity, adding sound coming from the individual objects that changes as you move around, and animated certain elements such as using an animated texture on a plane to create an ocean, and making the hands on the clock go around. I also created distant objects, such as the mountain by using a flat photoshopped image with an alpha channel, and then lit the piece with virtual lights. Finally, I used scripts to make the piece interactive and work using the gyroscope in a phone to allow you to look around inside the environment.
One of the things I proposed to achieve was exploring immersion and imaginary environments, which I would deem successful as the 3D sound and headset viewing system create almost full immersion, and the whole piece is based around the environment imagined by Dali. I also wanted to explore the relationship between 2D and 3D, which I have achieved as I took a 2D painting and turned it into an almost perfect 3D replica. I planned on utilising virtual reality, interactivity, animation, coding, stereoscopic 3D, and electronics, all of which I completed on some part of the FMP, and most of which (excluding electronics) are present in my final piece. I also managed to engage two or more of my audiences senses (sound, movement, and visuals). However, I hoped to have a physical element to my piece, which I only partially achieved as the headset is a physical item that must be used, but I could've pushed this much further.
If I were to improve this piece, I would try and engage even more of my audiences senses to create and entirely immersive experience, such as having things to touch or taste. I would also try and find a way to reduce my file size so that the experience would run more smoothly, or use a different, more powerful platform, such as the oculus rift. Finally, I would explore further how to incorporate a more physical element to this type of piece in order to fully achieve each and every one of my aims.
Second Final Piece Build Test
The second testing of my final piece is much closer to what I have in mind than the first. The soundscape really adds an extra dimension to the piece, and the way that the volume and doppler changes as you move around the scene vastly increases the immersive effect. However, it is still far from finished. There are a few minor elements I would still like to add to the piece, such as the rocks in the background. Also, the area is looking too large to me, and the objects are scaled to each other, but not to the character controller, making it look as if the user is in an oversized world. There is also too much empty space, and the objects are not placed at angles that show off the modelling to my standards. From this, I have been able to identify its strengths and weaknesses, and therefore am able to improve it for the final build.
First Final Piece Build Test
This piece, though inaccurate in terms of scale and accuracy to the painting, is showing me that I am very close to my final outcome. The piece works very smoothly on the phone, with the animated water showing clearly but subtly, and the clock hand clearly going around smoothly (even if it is facing away from the camera for now). It also allowed me to ensure the texturing looks as it should, and as it looks clean and realistic on the large scale, it should look perfect on the final, much smaller scale. The texture of the skybox is also very effective, making it look as if there is a vast sky overhead, yet having a sense of uncertainty as you can tell you are not out in the open, similar to that I imagine you would feel if you were trapped inside a painting. So far I have no technical difficulties, and therefore do not need to debug my piece. On the other hand, as of yet, it barely satisfies any of my criteria. It is not very immersive at all, and definitely requires some sound or engagement of another sense in order to complete this feeling. It also needs to be scales and rendered properly in order to create a believable environment.
Final Animation Testing
These are three videos showing different stages of testing for my final piece's animation. The first (lowest down) is the first animation test I did with my final model. I used very simple key framing and the computer generates all the tweens. This, however, clearly creates some problems. The computer is unable to tell the path that the hand should take, and as I need the hands to be moving at different speeds, I cannot just create a parent object containing the hands and centre circle in order to change the pivot point. This led me to change my technique for the second test.
In this second test (the second video) I created a keyframe at every 4 frames, and did one for each of the numbers on the clock. Again, this comes with its own issues. The movement of the hands are a lot less smooth than in the first test, though this actually creates quite a nice effect, making it seem more like real clockwork, and less like a computer generated animation. It also then cannot continue going round forever, unless I continue animated every 4 frames until the end of time (Or until I think people will stop looking at it) as the rotation value would have to continue to go up, otherwise it decides to go around the wrong way. This brought me to my final solution.
The final video (highest up) shows the animation once it had been imported into unity. I had the same keyframing system as the second test, but this time put on an F-cycle to make it continue spinning forever, without having to key frame the whole thing. This still isn't perfect as the last frame jumps slightly and the hands tend to go off in the wrong direction for a bit, but it is a vast improvement on the other tests. Also, the surrealist style of the painting lends itself very well to these extraordinary clock hands. If time was willing I would improve this by increasing the number of keyframes and finding a way to change the centre point to create smother animation.
Final Animated Ocean
The ocean on my piece has turned out better than expected, managing to successfully create the illusion of waves upon the water, without having to 3D animate them which would be time consuming, and make my file size far too big to be able to play on a mobile device. I used a single texture with a script that make it move at any speed and in any direction I chose. I also gave it a reflective texture and included a cubemap to give it some colour variation across the water. To improve it, I could try and find a more file-size economical way of doing it to reduce the lag on the surface, and also to keep my .apk (app) size as low as possible for the mobile device.
Texturing
In order to keep my assets looking as if they had bee painted (but in 3D) I took the original painting and photoshopped it to give me the textures for the objects. Though a labour intensive process, I managed to use the different content aware tools, along with the spot and patch healing, and the perspective and warping tools to create a full, flat net of each component out of the snippet of perspective image I had from the painting. This was very effective as it meant I could keep the original colours and textures in order to make a more accurate final model.
However, i did come across some difficulties during the texturing process. For example, I subsurfed all of my models prior to texturing. This meant that when it came to UV mapping, I had to move over 36,000 individual vertices per model in order to make my textures fit perfectly to the models. After some time (after finishing most of my models the incredibly time consuming way) I discovered that I could texture them prior to subsurfing, and then tweak them afterwards for the perfect fit. Also, as I used a very high quality photo for my textures, some of them struggled in blender to render correctly, meaning I had to attempt to UV map them without being able to see them properly. This had the knock on effect of making the file size very large as well, overall reducing the quality of my final piece post rendering. In order to improve my texturing I should try out using UV painting as an alternative to UV mapping which may be faster, easier and more suited to my purpose. I should also compress each of my image file sizes prior to texturing to improve performance without losing too much detail.
There were also a few other texturing techniques I used in my final piece, such as reflective texturing for the sea, or alpha channel particle texturing for the mountain. Though the sea has produced a very visually interesting image, it is not a key point of my scene yet takes up a lot of space to try rendering such a reflective, animated surface. It also required a bit of further coding to make the animated texture work. For the mountain I used a mobile version of a shader to keep the file size down, and used a Targa image with an alpha channel to create a see-through rim around my image. This has a much smaller effect on rendering and is a technique I should consider for reducing the sea's rendering issues.
Working With Low Quality Images
When I started the project, I based all of my shapes and modelling off of a standard quality photo of the painting from google images. This was a mistake. It didn't become noticeable until it was too late and I was far through creating my assets for my project. When texturing, it became obvious, the image I was using was not going to give me high quality textured models like I'd hoped, but little, pixilated squares that depicted nothing. This forced me to find a better quality image on the web, and then it became clear that I had missed out masses of detail from my models due to the lack of detail in the picture I was copying from. This meant that I now had to work incredibly hard on the texture portion of my final piece to make up for the detail lost in the models themselves. It also caused me to rethink certain portion of my scene, as in the first image I was working from, the sea was not visible and appeared to be part of the sky, and once I had the second I had to do some quick thinking and learning to figure out how to create a realistic sea in my background. Overall it vastly improved my project, though came a little to late for the perfectionist in me. Below is an example of changes I had to make, completely re-doing my skybox to create a much more realistic and natural looking sky that was more true to the original painting.
Creating Normals
Generating normals was not something I worries about at first, as blender renders faces as two-sided. Unity, on the other hand, does not. This is how I ended up with this peculiar problem of the faces disappearing on just one side when I imported my models into unity. After some research I discovered how to flip the normals on my objects, but this didn't entirely solve my problem as now it was the backs of the objects missing a face. Eventually, through some trial and error, I realised that if I duplicated my faces and placed them in exactly the same place, and then flipped the normals on one set of faces, I would end up with a complete face. This did however, set me back quite a lot of time as I had already finished modelling and was several steps ahead, which I had to undo in order to go back and fix it. In the end I had to make sure I got on with creating my textures to compensate for the lost time.
Modelling My Assets
I modelled my different assets in several different ways, merging techniques to create the shapes I needed. Modelling, of course, came with its own set of unique problems to overcome. For example, before I understood the importance of directing the normals in the correct direction, I accidentally created holes in some of my models, or couldn't understand why there were dark grey areas and light grey areas (pictured below). After importing them into unity, this became very clear and I was able to rectify the situation, even though it did waste some time. It was also challenging to try and get my models to accurately represent the 2D images in the painting. My orthographic drawings clearly were not perfect, as for some models I could not get an object to fit in all 3 axis'. This meant I had to use a certain level of creativity when modelling, whilst still trying to make my models as true to life as feasible. This was especially difficult when trying to model the depiction of Dali's face as it was very hard to visualise what the unseen sides of that would look like, and was therefore very hard to draw, and then incredibly hard to model. Overall I am very happy with how my models have turned out. They are very recognisable as having come from this painting and are highly accurate. If I were to improve them I would have used a lower level of subdivison to keep the file size down, and done most of the topography through illusion in texturing. I also would have been setting my normals from the start, and would have tried to ensure my orthographic drawings were more accurate if I could have.

Animation Plan

My flash created animation plan didn't exactly go to plan. I wanted to use this as a basis for the 3D animation I was to complete later, but realised why that wasn't to be the case along the way. The sketch is accurate to the piece which helps a lot, however, once I was animating the piece, I was using perspective so that you could see the changes taking place within the image, but this perspective is not accurate to that of real life, nor of my virtual reality. 2D and 3D animation are also very different, and what works in 2D doesn't necessarily work in 3D. This means that, though this piece can be used as a vague guideline for the sort of animation I may want in my final outcome, it cannot be used as instructions or a set in stone reference. One thing it did end up helping with, down the line, was the timings of the animation, and the keyframing of animating the clocks moving around the face.
Orthographic and Reference Drawings
 In order to create 3D objects from a 2D painting, I had to visualise what the other sides of said objects would look like, based on what I could see and the rules of perspective. After visualising these, I draw them out, using coloured,dashed lines as guidelines to keep everything in proportion, and then finally settling on three (or sometimes more) orthographic face on angles to draw to become my guides for modelling. This was a very difficult and though provoking task, especially when it came to attempting the side profile view of Dali's face on the floor. In the end, I ended up with decent quality vector images that were easy to follow and surprisingly nice to look at. When it came to putting them into practice though, some of the images did not fit as well together proportionally as they did when they were first being drawn. Though it created later challenges, it was overall a successful process in the journey to my final outcome.


Testing my Creations on the Oculus Rift
 After testing out the oculus rift in general, it was time to test out my own pieces on it to see if it was a suitable medium for displaying my final piece. I found it fairly easy to adapt my google cardboard pieces for the oculus rift, though some tweaking and downloads were required, which was quite time consuming. After getting it up and running, the playback wasn't all that different to using the google cardboard, though this could easily be due to the fact my test pieces were designed with google cardboard in mind and therefore didn't take full advantage of what the oculus had to offer. The infared camera offered more free movement than the cardboard, and the playback was slightly smoother. On the other hand it is unable to run without being attached to a computer, and is very heavy and complicated in design, which does help to increase the immersive experience with the larger screen and better grahics, however the wires take you out of the moment and makes the whole expeience feel more serious and less fun. Overall, the increase in quality didn't make up for the decrease in accesibility and took away from my aims more than it added to them.

Oculus Rift vs. Google Cardboard
I have tested out both virtual reality system, and written a list of pros and cons for each:
OR
Pros

User Input Testing
For my final project, I tested out three main types of character controlling user input: physical user input - wii remotes; partial physical user input - leap motion; and, internal user input - autowalk.
The wii remote was the first user input method I tried, and proved relatively easy to set up, but not so easy to use. Wii remotes are, by nature, bluetooth capable, so connecting one to your computer or phone doesn't present too much of a challenge. However, once it's connected, getting it to do something is a completely different task. I downloaded a wii remote unity plugin from the internet, and borrowed their piece of test code to test my connection. After changing the names of some of the entries and tweaking the syntax of the code a bit, I was able to use the accelerometer in the wii remote to control a cube in unity name 'wii parent'. This was very exciting, though as it used the accelerometer rather than the infared emitter, it was not very accurate and wouldn't exactly trace my movements. Also, blutooth is not a very trustworthy connection style and the remote would randomly disconnect itself, which wouldn't bode well for putting it int the show. Without coding an entirely new script I would be unable to use any of the other outputs of the wiimote, such as the buttons, and was lacking time to do this, so couldn't find a use for this user input in my final piece, and decided against the idea.
I then gave the leap motion a go, and this is by far the most fun, most useful, and most reliable for of user input that I tried. The leap motion can recognise exactly where your hands are, and what position they are in, or it can even recognise straight objects as 'tools' to do other jobs. When paired with the oculus rift, this little glass box is even more impressive! When paired with the google cardboard, not so much. That is to say, not at all. I was unable to find any way the leap motion would be able to interact with the google cardboard. This is mainly because the leap motion needs to run off of a computer, whereas google cardboard relies on the miniscule power of mobile devices. If it were to work, the leap motion would have been an excellent addition to my final piece, increasing the interactivity infinitely, however, this was not one worth spending any more time on.
My final attempt at attaining user input (apart from head tracking) into my piece took a rather different approach to the other two. This input was entirely internal and follows in the footsteps of most other mobile based virtual reality systems. It is an autowalk feature, basically meaning that there is an object in the scene, that when the users' vision centres it, they automatically begin moving forwards, and must tilt their head to navigate. Like with the wii remote, it was very easy to get up and running. I created a very simple test scene containing only a ground plane and a ball in the sky. I then used a piece of code that allowed me to use the ball as a switch to start and stop the movement. I only came across two problems with this type of user input, one small and one large. The small problem was that I could not manage to get it so that the head tracking would control turing, so the character would move in a straight line and then fall off the platform. This was an issue would would've been fixable if the next problem hadn't been such a large one: when the app loaded it crashed the phone, every time, without fail. I tried multiple different build settings but nothing would rectify the situation, so I didn't waste any more time on it and focused on other elements of my piece.
Project Proposal Final Draft
In order to keep my assets looking as if they had bee painted (but in 3D) I took the original painting and photoshopped it to give me the textures for the objects. Though a labour intensive process, I managed to use the different content aware tools, along with the spot and patch healing, and the perspective and warping tools to create a full, flat net of each component out of the snippet of perspective image I had from the painting. This was very effective as it meant I could keep the original colours and textures in order to make a more accurate final model.
However, i did come across some difficulties during the texturing process. For example, I subsurfed all of my models prior to texturing. This meant that when it came to UV mapping, I had to move over 36,000 individual vertices per model in order to make my textures fit perfectly to the models. After some time (after finishing most of my models the incredibly time consuming way) I discovered that I could texture them prior to subsurfing, and then tweak them afterwards for the perfect fit. Also, as I used a very high quality photo for my textures, some of them struggled in blender to render correctly, meaning I had to attempt to UV map them without being able to see them properly. This had the knock on effect of making the file size very large as well, overall reducing the quality of my final piece post rendering. In order to improve my texturing I should try out using UV painting as an alternative to UV mapping which may be faster, easier and more suited to my purpose. I should also compress each of my image file sizes prior to texturing to improve performance without losing too much detail.
There were also a few other texturing techniques I used in my final piece, such as reflective texturing for the sea, or alpha channel particle texturing for the mountain. Though the sea has produced a very visually interesting image, it is not a key point of my scene yet takes up a lot of space to try rendering such a reflective, animated surface. It also required a bit of further coding to make the animated texture work. For the mountain I used a mobile version of a shader to keep the file size down, and used a Targa image with an alpha channel to create a see-through rim around my image. This has a much smaller effect on rendering and is a technique I should consider for reducing the sea's rendering issues.
 |
| Original Painting |
 |
| Photoshopped Texture |
 |
| Final Textured Model |
Working With Low Quality Images
When I started the project, I based all of my shapes and modelling off of a standard quality photo of the painting from google images. This was a mistake. It didn't become noticeable until it was too late and I was far through creating my assets for my project. When texturing, it became obvious, the image I was using was not going to give me high quality textured models like I'd hoped, but little, pixilated squares that depicted nothing. This forced me to find a better quality image on the web, and then it became clear that I had missed out masses of detail from my models due to the lack of detail in the picture I was copying from. This meant that I now had to work incredibly hard on the texture portion of my final piece to make up for the detail lost in the models themselves. It also caused me to rethink certain portion of my scene, as in the first image I was working from, the sea was not visible and appeared to be part of the sky, and once I had the second I had to do some quick thinking and learning to figure out how to create a realistic sea in my background. Overall it vastly improved my project, though came a little to late for the perfectionist in me. Below is an example of changes I had to make, completely re-doing my skybox to create a much more realistic and natural looking sky that was more true to the original painting.
 |
| The first skybox I created with the low quality image |
 |
| The final skybox created with the high quality image |
Creating Normals
Generating normals was not something I worries about at first, as blender renders faces as two-sided. Unity, on the other hand, does not. This is how I ended up with this peculiar problem of the faces disappearing on just one side when I imported my models into unity. After some research I discovered how to flip the normals on my objects, but this didn't entirely solve my problem as now it was the backs of the objects missing a face. Eventually, through some trial and error, I realised that if I duplicated my faces and placed them in exactly the same place, and then flipped the normals on one set of faces, I would end up with a complete face. This did however, set me back quite a lot of time as I had already finished modelling and was several steps ahead, which I had to undo in order to go back and fix it. In the end I had to make sure I got on with creating my textures to compensate for the lost time.
 |
| Left: original model with normals facing backward, Right: model with normals switched to forwards |
 |
| Reversed normals on both normals, problem continues |
 |
| Left: Fixed shape with double faces and normals going both ways, Right: Original model that appears correct from the the front, but is see-through in the back |
Modelling My Assets
I modelled my different assets in several different ways, merging techniques to create the shapes I needed. Modelling, of course, came with its own set of unique problems to overcome. For example, before I understood the importance of directing the normals in the correct direction, I accidentally created holes in some of my models, or couldn't understand why there were dark grey areas and light grey areas (pictured below). After importing them into unity, this became very clear and I was able to rectify the situation, even though it did waste some time. It was also challenging to try and get my models to accurately represent the 2D images in the painting. My orthographic drawings clearly were not perfect, as for some models I could not get an object to fit in all 3 axis'. This meant I had to use a certain level of creativity when modelling, whilst still trying to make my models as true to life as feasible. This was especially difficult when trying to model the depiction of Dali's face as it was very hard to visualise what the unseen sides of that would look like, and was therefore very hard to draw, and then incredibly hard to model. Overall I am very happy with how my models have turned out. They are very recognisable as having come from this painting and are highly accurate. If I were to improve them I would have used a lower level of subdivison to keep the file size down, and done most of the topography through illusion in texturing. I also would have been setting my normals from the start, and would have tried to ensure my orthographic drawings were more accurate if I could have.

Animation Plan
My flash created animation plan didn't exactly go to plan. I wanted to use this as a basis for the 3D animation I was to complete later, but realised why that wasn't to be the case along the way. The sketch is accurate to the piece which helps a lot, however, once I was animating the piece, I was using perspective so that you could see the changes taking place within the image, but this perspective is not accurate to that of real life, nor of my virtual reality. 2D and 3D animation are also very different, and what works in 2D doesn't necessarily work in 3D. This means that, though this piece can be used as a vague guideline for the sort of animation I may want in my final outcome, it cannot be used as instructions or a set in stone reference. One thing it did end up helping with, down the line, was the timings of the animation, and the keyframing of animating the clocks moving around the face.
Orthographic and Reference Drawings
In order to create 3D objects from a 2D painting, I had to visualise what the other sides of said objects would look like, based on what I could see and the rules of perspective. After visualising these, I draw them out, using coloured,dashed lines as guidelines to keep everything in proportion, and then finally settling on three (or sometimes more) orthographic face on angles to draw to become my guides for modelling. This was a very difficult and though provoking task, especially when it came to attempting the side profile view of Dali's face on the floor. In the end, I ended up with decent quality vector images that were easy to follow and surprisingly nice to look at. When it came to putting them into practice though, some of the images did not fit as well together proportionally as they did when they were first being drawn. Though it created later challenges, it was overall a successful process in the journey to my final outcome.Testing my Creations on the Oculus Rift
After testing out the oculus rift in general, it was time to test out my own pieces on it to see if it was a suitable medium for displaying my final piece. I found it fairly easy to adapt my google cardboard pieces for the oculus rift, though some tweaking and downloads were required, which was quite time consuming. After getting it up and running, the playback wasn't all that different to using the google cardboard, though this could easily be due to the fact my test pieces were designed with google cardboard in mind and therefore didn't take full advantage of what the oculus had to offer. The infared camera offered more free movement than the cardboard, and the playback was slightly smoother. On the other hand it is unable to run without being attached to a computer, and is very heavy and complicated in design, which does help to increase the immersive experience with the larger screen and better grahics, however the wires take you out of the moment and makes the whole expeience feel more serious and less fun. Overall, the increase in quality didn't make up for the decrease in accesibility and took away from my aims more than it added to them.Oculus Rift vs. Google Cardboard
I have tested out both virtual reality system, and written a list of pros and cons for each:
OR
Pros
- High performance
- No lagging
- Can wear if needing glasses
- Hands free
- Leap motion integration
- Interchangeable lenses
- Supports full movement
- Adjustable
Cons
- Requires a computer at all times
- No headphone slot
- Bulky
- Lots of wires
- Expensive
GC
Pros
- Lightweight
- Cheap
- Replacable
- DIY-able
- Headphone slot
- Flatpack
- Make shift feel
- Wireless
- Standalone
Cons
- Low performance
- Lags
- Not suitable for people with glasses
- Must hold onto face
- Not adjustable
- Only supports 360 degree panning
From looking at my lists, the google cardboard has both more pros and more cons, but the pros, at least for my current project, outweigh the cons. Also the availability of it means I could even distribute my app elsewhere, and there wont be any disasters if something happens to one of them.
 |
User Input Testing
For my final project, I tested out three main types of character controlling user input: physical user input - wii remotes; partial physical user input - leap motion; and, internal user input - autowalk.
The wii remote was the first user input method I tried, and proved relatively easy to set up, but not so easy to use. Wii remotes are, by nature, bluetooth capable, so connecting one to your computer or phone doesn't present too much of a challenge. However, once it's connected, getting it to do something is a completely different task. I downloaded a wii remote unity plugin from the internet, and borrowed their piece of test code to test my connection. After changing the names of some of the entries and tweaking the syntax of the code a bit, I was able to use the accelerometer in the wii remote to control a cube in unity name 'wii parent'. This was very exciting, though as it used the accelerometer rather than the infared emitter, it was not very accurate and wouldn't exactly trace my movements. Also, blutooth is not a very trustworthy connection style and the remote would randomly disconnect itself, which wouldn't bode well for putting it int the show. Without coding an entirely new script I would be unable to use any of the other outputs of the wiimote, such as the buttons, and was lacking time to do this, so couldn't find a use for this user input in my final piece, and decided against the idea.
I then gave the leap motion a go, and this is by far the most fun, most useful, and most reliable for of user input that I tried. The leap motion can recognise exactly where your hands are, and what position they are in, or it can even recognise straight objects as 'tools' to do other jobs. When paired with the oculus rift, this little glass box is even more impressive! When paired with the google cardboard, not so much. That is to say, not at all. I was unable to find any way the leap motion would be able to interact with the google cardboard. This is mainly because the leap motion needs to run off of a computer, whereas google cardboard relies on the miniscule power of mobile devices. If it were to work, the leap motion would have been an excellent addition to my final piece, increasing the interactivity infinitely, however, this was not one worth spending any more time on.
My final attempt at attaining user input (apart from head tracking) into my piece took a rather different approach to the other two. This input was entirely internal and follows in the footsteps of most other mobile based virtual reality systems. It is an autowalk feature, basically meaning that there is an object in the scene, that when the users' vision centres it, they automatically begin moving forwards, and must tilt their head to navigate. Like with the wii remote, it was very easy to get up and running. I created a very simple test scene containing only a ground plane and a ball in the sky. I then used a piece of code that allowed me to use the ball as a switch to start and stop the movement. I only came across two problems with this type of user input, one small and one large. The small problem was that I could not manage to get it so that the head tracking would control turing, so the character would move in a straight line and then fall off the platform. This was an issue would would've been fixable if the next problem hadn't been such a large one: when the app loaded it crashed the phone, every time, without fail. I tried multiple different build settings but nothing would rectify the situation, so I didn't waste any more time on it and focused on other elements of my piece.
Project Proposal Final Draft
This is the final draft of my project proposal, having been updated as my research has continued. It outlines all of my aims and intentions, and how I plan on measuring my success, as well as how I have arrived at this concept for my FMP. If I was allowed more words I would expand upon each of the points I have made, but due to this constraint have kept it succinct and to the point whilst managing to retain all the vital information, ready to complete my final piece.
A review of progress and
achievement through parts 1 and 2 of the course
Prior to starting the course, I had an
understanding of more traditional art practices eg. Drawing, painting, and
filmmaking, and very basic knowledge of animation. In the first section of the
course I learnt a wide range of new skills such as screen-printing and making
maquettes, but the most valuable skills I learnt were in the pathway that I
then continued onto in part 2: Media. In this pathway I deepened my knowledge,
skills, and understanding of many aspects of film, animation, and photography, namely:
photo-development, stop-motion, rotoscoping, photoshop, after-effects, and
flash. Though I was mainly focusing on different animation techniques in this
part of the course, I did a short workshop on interactive art and decided this
is the area I wanted to pursue further for my FMP. I hope to go onto a degree
in ‘Interaction Design Arts’ next year, and this project will help me prepare
for that and find out more about interactivity.
Project concept
With this project, I want to explore immersion, and
the creation of imaginary environments. I also would like to have an element of
interactivity or responsiveness in my final piece. To achieve this I plan on
experimenting with virtual reality, animation, coding, stereoscopic 3D, and
electronics. In terms of visuals, I want to explore the relationship between 2D
and 3D, and find a way to merge the two for my final piece. For my initial
research, I am going to start by looking into existing pieces that use similar
media to those I will look into, for example, art-works that are interactive,
use virtual reality, or use electronics. I will then research into the methods
and software I will require in order to complete my project. At this stage I
have identified that to be working in virtual reality or computer-based
interactivity, I will most likely need to use a game-engine, such as unity, and
if I am going to be working with electronics I will need to work with coding
with microprocessors, such as Arduino. The types of resources I will need will
be mostly software and computer programme based, but as I would also like to
incorporate a physical element to my piece, other practical skills and
resources will be necessary. I aim to create a piece that is fully immersive
and engages two or more of my audiences’ senses, eg. Visuals, audio, and
movement, is easy to use and user-centric, and follows the themes of imaginary
environments and 2D/3D relationships. I hope to present this in the form of a
virtual reality or interactive environment, though am open to experimentation
and am prepared for change and development due to my ideas moving on, and the
availability of resources.
Evaluation
To reflect on and evaluate my work I will be
keeping a log of my progress on the ‘ReflectiveBlog’ page on my blog. On this
page I will analyse and evaluate each test piece I complete to help me mould
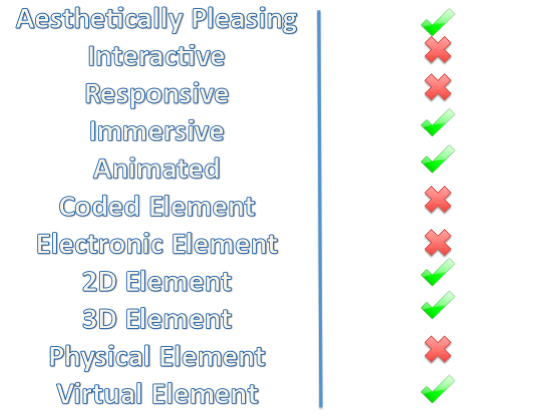
which direction to take my project, and I will create a quick checklist graphic
to fill in to give myself a visual representation of which pieces meet my aims
or not. I will know I’ve been successful if my audience interact with my piece
without needing to be shown what to do, and they become immersed – I can judge
this by the amount of time they spend looking at it. I can also judge my
success by how well I manage to merge my media, how believable my imaginary
environment is, and whether or not I can smoothly integrate both 2D and 3D.
Gallery Presentation Ideas
Now that I have a better idea of what my final piece is going to be, I need to start thinking about how I am going to present it, as this will affect the build process. In terms of presentation, I only know one thing for sure, and that is that my project is to be shown on a smart phone, with a google cardboard headset. Google cardboard sets can be made yourself out of cardboard and a few other cheap materials using the guides on their website, or you can buy kits containing everything you'll need off of Ebay for 99p. Using this, I can put a smartphone into the headset, and as you look through the lenses at the phone it creates a 3D image. Using the game engine 'Unity' as I plan to do, I can upload things I create directly onto Android phones for free, whereas if I hopes to use phones on other operating systems, or other devices, I would have to pay licensing fees. Because of this, I am most likely going to use an Android phone (or Android phones) to present my project. Unfortunately, I am not in the possession of an Android phone, so this is a problem I'll need to solve before I complete my project. For the finer details of how I am going to present my final piece, I have multiple ideas, some of them depend on which of my initial concepts I plan on exploring, and they range from simple and definitely possible, to complicated and probably out of the question - budget-wise.
My simplest idea would be to have a small plinth on which the google cardboard could rest, and then a marked out area on the floor so that people did not hurt themselves when using the virtual reality device. This would for almost all of my ideas, and could be adapted depending on how they differ for example, I could simply plug in headphones to the smartphone for if I include music and sound effects, or I could have a wii remote sitting on the plinth and a dance mat in the area on the floor for if I am doing a more interactive piece. This idea is simple and easily doable, however, it means that I will have to source an android phone from somewhere, either finding someone with one that is willing to let me keep it in exhibition for a while, or replace it every day, or I will have to buy one, which isn't very practical.
Another way of presenting my idea, which removes the need for me to have an android phone, would be to package my environment as an app, and to put it on an in-phone store so that viewers can download it themselves. A bit of research has shown me that for the IOS app store, this would be very expensive and complicated, and for the official google play store on android it would cost $25 (around £15). However, there are other app stores on android that I could upload it to for free, or I could upload it to an existing open VR app. Once I had done one of these, I could create a unique QR code for it or programme an NFC tag that would launch the app in store, and put these around the building. I would then make multiple Google Cardboard headsets available, and anyone with a smart phone would be able to scan the the QR code or NFC tag and view my project on their own phones. A problem with this is that, due to pricing issues, it would only be available to people with Android smart phones, and I would have to buy multiple headsets. Also, the fact that the audience has to do something in order to view the piece could either be an exciting twist, or it may put them off of viewing it.
If I was to try and create my 'sense' world experience, I would have to present my final piece in quite a different way. I would have to have an entire set for my piece, matching that of the size of the virtual world, so that when one moved inside the virtual would they would reach the corresponding real world objects at the same time.
Finally, as an interesting extension to my first idea, I could set up a camera facing the area marked out for using the google cardboard. I could then set up a screen in the next room of the gallery, live streaming each person's reactions to the piece. This could be interesting as people immersed in a virtual reality look very strange and humorous to anyone on the outside. Therefore, people could view the piece and then walk through and see what they would've looked like whilst viewing the piece, adding an extra dimension to it and also helping me monitor my success through audience reaction.
Virtual Reality Test Piece 4
This is the third Test piece I have completed based on my initial ideas, and I would say it is the most successful one. Though the modelling isn't my own (which could be a contributing factor) the virtual reality element works better in this style. The recognisability of the painting adds an extra dimension to the piece as it gives a sense of familiarity within the unknown. This piece is far more aesthetically pleasing than the others, and with all the stairs you can go up and down, feels a lot more interactive as well. The 2D/3D link feels stronger as well, as the painting should have only made sense in 2D, but the modeller has found a way to make it exist in 3D, adding in a sense of impossibility to the piece which draws in more excitement. Though still unanimated, and lacking in both physical and electrical elements, this piece or at least this concept feels like it has a much wider range of opportunities to move on to, and I will most like be able to find a way to incorporate those other desire elements - or at least would be more willing to.

Virtual Reality Test Piece 3
This is another test piece based one one of my initial ideas - 3D paper world. I've managed to complete that idea basically in its entirety with this test piece, which suggests to me it doesn't have much left to develop. It isn't as visually interesting as I'd hoped, which could be down to my modelling or texturing, but the idea as a whole is starting to feel slightly over-stylised in quite a generic and repetitive way, and I'm not longer a fan of the direction it is going in. As for interactive or animated elements, this piece gives basically no scope for coming up with interesting concepts, and it lacks in both physical and electronic elements in a way that feels like there is no solution to. I have learnt from this piece what i don't want my final piece to end up like, and should stay away from over-stylising early on or giving myself too many restrictions to creativity.

Virtual Reality Test Piece 2
This is the first full virtual reality test piece I created, based on my initial idea of the 2D/3D world (minus the wii remotes and dance mats - for now).
This video shows the working environment. I like the assets I have created, with the strange 2D drawings that have been crudely made into 3D objects, however, they do leave something to be desired stylistically, especially when it comes to the textures - or lack of. The perspective of the piece works well and the virtual reality element is coming along nicely, with smooth head tracking, though the style of this environment doesn't give a realistic feel at all. I would also say that this piece has not quite reached the level of interactivity I desire, though in terms of responsiveness it is there as it responds nicely to your movements. This piece does contain coded and virtual elements but is still lacking in physical, electronic, and animated elements. Overall, as a first attempt this piece has been successful, but is a long way from becoming something I would be happy to showcase.
This video shows the first test of my first virtual reality test piece. As you can see in the video, I have got the coding for the basic user input - the head tracking - wrong in some place, and the only input it will react to is that of a finger touching the screen and dragging it around. This piece has shown me that my test piece does indeed build to a phone, and the graphics of it look good on said phone, however, I need to make a quick fix in order to solve the error of that missing piece of coding.
This video shows the second testing of my first virtual reality test piece, and, as you can see, I managed to fix that bit of script fairly quickly and easily as it was simply the case of activating an inactive script. This test has shown me how smoothly the tracking is able to work on the phone, and how the distortion on the graphics makes a huge difference. However, as it is not in a headset I am unable to see whether or not the distortion is working correctly or not as of yet.
This is the third testing phase of my first virtual reality test piece, and I have given the phone to a virtual reality novice, with no instructions but to describe out loud what she is doing and what she is seeing. This testing gives me multiple benefits: I get to see how difficult it may be to operate to someone who is unfamiliar with it; I am able to receive an unbiased opinion on my work; and, I can understand whether or not my piece acts on its intentions when someone is unaware of what they are looking for. From this experiment, I can conclude that though the piece may not be entirely self explanatory, it shouldn't require full instructions as my test subject figure it out pretty quickly. I also learnt that my piece seems to be a novelty and a learning experience to the unexperienced, and this adds another dimension to my piece. Finally, I can see which bits I need to work on, such as ensuring the image is clear and that the headset is in good condition - points I did not consider before as I was too caught up on the virtual element, I forgot the physical element was important too.

Does CAD (Computer Aided Design) Make a Piece Lose Its Heart?
When working on 3D models, animation, or anything really in the 'real world' there is always a level of uncertainty and imperfection that helps to give an art piece character. Just as an expressionist painting can't be done with slow, deliberate brushstrokes trying to create 'perfection', a model will always have some sort of minute bumps, scratches, and other tiny unintentional details that make the piece seem 'real'. When working on the same things on a computer, this is not the case. 3D computer modelling uses vertices, edges, and faces to make up a three-dimensional shape. The further away from each other the vertices are, the more geometric a shape will look. The only way to create organic looking shapes in 3D modelling is by using subsurf modifiers to smooth out the shape. In a way, this creates shapes that are 'too smooth'. It is very difficult to find a happy medium between shapes that look 'blocky' and geometric, and those that look overly smoothed, perfected, and fake.
There are a few ways around this problem that allow my pieces to look right as an art form, as opposed to a graphical representation:
Randomise it
Using a displacement modifier, or any other modifier that randomly transforms the points on your model slightly, will help it to look more 'real'. It takes away from the symmetricality of the model and adds in small bumps and dips in the surface, like those you would expect when working with clay. However, like many things the computer does for you, it is very easy to 'overdo' it. This modifier tends to affect the entire model, and it is difficult to not end up with just a lumpy shape. Also, even with the randomisation, the bumps can still manage to look too manufactured.
Build in imperfections
Similar to the first option, you would add bumps, dips and scratches to make a model look less fake, but do it by hand rather than using a modifier. This is very time consuming and open to human error or accidental systematicality, but produces much nicer results. This technique was utilised by the makers of 'The Lego Movie', who analysed lego bricks under a microscope to see what sort of tiny imperfections they had, so that they could apply them to their modelled bricks.
Do as much by hand as possible
Obviously 'by hand' is not being used in a literal sense here, but the real world ideologies apply. The less of the built in tools you use, such as mirroring, bevel, subsurf, etc. and the more you shape the model yourself, the more natural the results will turn out. This reduces how symmetrical, smooth, and perfectly formed an object will be, and allows it to have a more hand-crafted feel. A good rule to go by is to turn off snapping when modelling organic shapes. There are a few drawbacks of course, time being one of them as the more you do without the help of the programme, the longer it will take. Also, the lower the level of automatic accuracy you use, the higher the risk of the object coming out as unidentifiable rather than artisan.
Make it part of the look
Depending on the project, overly perfect looking objects could actually add to the overall aesthetic and meaning behind it. For example, if you're trying to create a virtual world that alienates the audience, making it as far from real life as possible is a definite benefit. Perfection can be unnerving in a very subtle way, and when paired with the right music or narrative, can create an excellent dystopia than an audience can't quite put its finger on. On the other hand, it is far too simple to take the easy way out and leave the models looking like they've been designed by a robot and using this as an excuse, so it is definitely to be used with caution.
Detailed Planning - Gantt Chart
Detailed Planning - Gantt Chart
At this point - having pitched my project and had it accepted - I am now ready to plan my project properly, to a time limit, to ensure that I know what I have to do and can achieve it within the time frame I have been given. I started by breaking my project down into four parts: research (most of which I have completed already as my preparation), pre-production, production, and, post-production. I then broke it down further by writing out a list of individual actions I must complete in each section, and then estimating the time it will take to complete each of these actions. Once I had these, I could plot them onto my chart, lining up actions that rely on the completions of other actions, stacking those that can be completed simultaneously, and overall making sure I make full use of the time I have been allocated without going over deadline. Then I could finish off by plotting in milestones and filling in the percentage of completion of each action so far so that I can easily track my progress.
Pecha Kucha Presentation
Before our project proposals were finalised, we pitched our ideas in front of a group of our peers and a panel of tutors in order to receive feedback and have our projects accepted. We presented in a similar style to that of 'Pecha Kucha', but where PK allows you to show 20 slides for 20 seconds each, we were given the task of presenting our ideas on just 3 slides, and had 40 seconds to talk about each slide. The slides were separated into 'What' our concepts were, 'How' we would achieve them, and 'Why' as in, what we would learn from them. I decided to keep minimal information on my slides (seen below) and get my ideas across mostly through talking.

On my first slide I explained my concept in terms of where my ideas came from, where they were going, and what I am influenced by. I described my idea of creating an imaginary world/environment, that is user-driven and immersive. I included a picture of 'Eshu' - the interactive robotic flower I created as part of the 'Inorgnisms' workshop - as illustration of what led me to look into interactivity. I also included a list of my initial ideas for the aesthetics of my piece, and an image illustrating my influence by surrealist art and as a possible concept idea.

I filled my second slide with images alone of how I plan on realising my ideas. The image in the bottom left corner shows a 'Google Cardboard' headset: the way in which I am planning on presenting my creation, as a virtual reality environment. The two logos show the softwares I will be using to create it: blender, as my 3D modelling software to create the components and animations of the environment; and unity, as the engine to put the environment together and introduce the head tracking and interactivity. Finally I included images of a dance mat and wii remote as they as possible tools for increasing the interactive component of my piece.

Finally, on my third slide I included a list of things that I should learn during the realisation of this project, and explained them in turn in relation to how I will learn each one and know whether I have been successful or not.
My petcha kutcha presentation went fairly well, with my peers and tutors all agreeing to my project proposal with no dispute. However, i do think some of my ideas are still too broad, and I am still trying to take on as much as possible, which may end without a strong final piece at the end. From this I have decided that when it comes to writing up the final draft of my project proposal, I must try and narrow my ideas down a little bit to make it overall more achievable, and to ensure I finish the project with a strong, positive result.
Project Proposal Final Bullet Points
These are the final bullet points for my project proposal, helping me to break it down before I write it up into a long but succinct paragraph.With this I have made sure to cover all of my bases and included everything that is what I want to achieve. Looking at this, before I complete my final draft I need to think about which parts are important and which parts are not as I don't want to try and do everything and take on too much and then end up with a half hearted final piece.
A review of progress and achievement through parts 1 and 2 of the course
· Exploring
different animation techniques
· Interactive
work
· Chose
Media & why
· Longer
term aspirations – IDA and life
· Moving on
from animation
· Summary
of things I knew
· Summary
of things I learnt – knowledge, skills & understanding
· How media
has informed my project
Immediate
aspirations will be fulfilled
Project concept
· Imaginary
environment
· Interactivity
· Virtual
reality
· Animation,
coding, dual image 3D, electronics
· Exploring
the relationship between 2D and 3D
· Aims
· What I
will research, what other things already inform my project
· What I
will produce
· Resources
I will need, levels of skill I will need, what I need to learn Form of
presentation
How
I will allow for adaptations due to changing ideas, facilities, etc
Evaluation
·
Fully immersive experience
·
Merge media and
styles
·
User surveys
·
Record
participant reactions
·
Reflective
section of blog
|
Related
to aims, how I will know I’ve been successful
Who is my Target Audience?
Now I'm starting to gather together my ideas, I need to understand that my own opinion is not the only thing that counts when it comes to my final piece: I have to take into account feedback from my tutors and peers, and, arguably the most important group that I should be catering for is my audience. As my general idea so far is a very user-centric piece, I must make sure that they will both understand how to use it and will be drawn to it. Once I understand who my target audience is, I can direct my project in a way that will appeal to them.
The audience I will have for my final piece has already partially been decided for me: foundation art's end of year show attendees. Part of me would like to draw in my own audience, specific to my final piece, but without the money, resources, or time to do this, sticking with the audience I will automatically get seems like the way to go. In order to taylor my piece towards them, I will need to make some assumptions on who my audience is going to be. Many different people may be drawn towards an art showcase such as this, but the main groups I can presume will be there are: parents, friends, and family of students in the show; prospective foundation students for next year; other art students from this course and otherwise; tutors and staff from this university and possibly others; and, other local general art 'enthusiasts'.
Though there are a few different types of people mentioned above, they all share at least some characteristics. The aim of presenting a project to a specified audience is not to attempt to please everyone perfectly, but to find a way to make my project appealing in some way to the majority. Most of the people coming to view the end of year show will have an interest in, and some knowledge of art - this goes without saying - but there is no guarantee any of them will have an interest in or knowledge of technology, namely: virtual reality technology. Because of this, I should find a way to make the user interaction as simple as possible, and have clear instructions with my piece in order to allow more people to enjoy it. Also, the communal interest in art is something I should try and take advantage of as much as possible. I should try and make my piece as aesthetically pleasing as possible, and could even take it one step further by incorporating some sort of well know art history into my piece, for example, modelling a 3D world out of famous paintings. My audience are likely to recognise these, and people are more likely to give a positive reaction to things they are partially familiar with. As using virtual reality as a medium takes people out of their comfort zone as it is something the general public are not accustomed to, adding a sense of familiarity with something such as the well known paintings is likely to make my piece more of a success.
Concept 3 - Concept Art

My third concept is another piece of concept art based on one of my initial ideas - the 2D/3D game world. I have created a landscape scene out of entirely flat elements - so it looks as if the whole thing is build as a set. This ties in with my thoughts about immersive theatre as it makes the user feel as if they are an actor on set. It is fairly visually interesting but not particularly aesthetically pleasing, and currently contains no interactive, responsive, physical or coded elements, though it is fairly open as it too could be the location for a virtual reality environment, animation, or film, etc. It also lacks any sort of electronic element, but makes up for it in its strong exploration of 2D and 3D styles.

Concept 2 - Concept Art

My second concept is a piece of concept art derived from my initial idea of the 2D/3D paper cityscape. I drew on the idea by putting tiny messages into the textures of newspaper, and including well known tabloid headlines as part of it. I used the steep perspective to try and indicate a deep immersion in this environment, which could become the location for an animation or film, or a virtual reality piece. It currently has no plans for responsivity or interactivity, though is open enough to be easily mouldable should the desire arise. It, again, looks into the idea of incorporating both 2D and 3D elements by using the newspaper texture on 3D buildings.

Concept 1 - Step Outline


Project Proposal First Bullet Points

My third concept is another piece of concept art based on one of my initial ideas - the 2D/3D game world. I have created a landscape scene out of entirely flat elements - so it looks as if the whole thing is build as a set. This ties in with my thoughts about immersive theatre as it makes the user feel as if they are an actor on set. It is fairly visually interesting but not particularly aesthetically pleasing, and currently contains no interactive, responsive, physical or coded elements, though it is fairly open as it too could be the location for a virtual reality environment, animation, or film, etc. It also lacks any sort of electronic element, but makes up for it in its strong exploration of 2D and 3D styles.

Concept 2 - Concept Art

My second concept is a piece of concept art derived from my initial idea of the 2D/3D paper cityscape. I drew on the idea by putting tiny messages into the textures of newspaper, and including well known tabloid headlines as part of it. I used the steep perspective to try and indicate a deep immersion in this environment, which could become the location for an animation or film, or a virtual reality piece. It currently has no plans for responsivity or interactivity, though is open enough to be easily mouldable should the desire arise. It, again, looks into the idea of incorporating both 2D and 3D elements by using the newspaper texture on 3D buildings.
Concept 1 - Step Outline
After looking at my initial sources, namely Filipe Costa I have developed a vague concept of a first person POV moving image piece, in which the viewer is put into a 2D world, possibly of a game, and is able to look around it as a 3D entity in said world, seeing what it would look like if they were a character in that game. It plays with the idea of 2D and 3D having pixels represented as line segments when they are in profile, and is entirely animation based. It has a level of interactivity with the possibility of a game, and responsiveness with the ability to look around. It has the potential to be aesthetically pleasing, and with the game element would have physical and electrical elements to enable gameplay. In the style I've written it, I imagine it to be pretty immersive, however it would not contain any coded elements.


As an alternative to getting weighed down by committing to full sentences in my project proposal a this stage, I have started writing a list of bullet points of what my project proposal is to cover. I have made very brief notes about the most important things I must include in my final draft, but have ensured that I have left it open enough for changes to occur as I go alone, without being too open. The notes are looking fairly sparse so this draft has taught me that I need to think more deeply about what it is I want to do, possibly by consulting my question list and initial ideas and concept art for inspiration.
A review of progress and
achievement through parts 1 and 2 of the course
· Exploring
different animation techniques
Interactive
work
Project concept
· Imaginary
environment
· Interactivity
· Virtual
reality
Animation,
coding, dual image 3D, electronics
Evaluation
·
Fully immersive
experience
·
Merge media and
styles
·
User surveys
|
Initial Ideas
My main concept is to create an imaginary world to be viewed through a 'google cardboard' headset, taking advantage of the head tracking and 3D imaging that it allows. Here are my initial ideas of what form that imaginary world might take:
Immersive theatre/virtual world/sense world
3D paper world - responsive animation
2D/3D with wii remotes/dance matt, interactive/possible game
Interactive Tarot Card reading
Entering a Painting
Immersive theatre/virtual world/sense world: I would create a world designed to completely immerse the viewer and all of their senses. The world would be viewed through the headset and would feel completely real, eg. if in the headset the viewer could see an animal in front of them and reached out to touch it, I would have placed some furry material in the real world room so that it would feel as if they are actually touching said virtual animal. I would manipulate all their senses, creating things to touch, smell, hear, see and even taste to make the experience seem as real as possible. In a similar way to immersive theatre, I could use actors in the room as characters in the virtual world, changing how they look inside the headset. I could use miracle berry tablets to create taste sensations unknown to most people and create a fully immersive experience unlike real life in any way.

3D paper world - responsive animation: I would create a 3D world that appears as if it it made up of 2D materials, for example, all the buildings would appear as if they had been folded up out of newspaper. From this I could create humour by adding components such as bollards made of drawing pins, or having construction sites made up of staples and paper clips. Using the headset the viewer would be able to look around this environment. I would then code in a way for the environment to react to the viewer, for example, the entire landscape could be completely empty, but then once the viewer looks into the empty space, a building immediately 'grows' and begins to fold itself out of paper. This means that the animations I create would be triggered by the viewer looking around and would create a responsive, if not interactive, environment.

2D/3D with wii remotes/dance matt, interactive/possible game: by using the bluetooth capability of wii remotes, balance boards, and dance matts, I could create a virtual environment with a higher level of interactivity. The user could control walking around the environment by stepping on the arrows of the dance matt, or use the wii remotes to indicate where there hands were and allow them to 'pick up' things from inside the environment. With this, I could even create a game where the remotes act as a controller, the dance matt or balance board allows them to move, and the headset allows them to look around inside this virtual environment. I would play with merging 2D and 3D, creating all the artwork in 2D and then rendering it in 3D so that from straight onwards everything looks 3D, but once you move around it becomes clear that the objects are more like flat paintings on pieces of set. This could be interesting as things that would've been plain line segments could become pictures once viewed from the correct angle.

Interactive Tarot Card reading: Following on from the work I did in the pathway stage of the foundation, I could create a small environment with another character inside. I would put the viewer into the situation of being given a tarot card reading by a psychic, and could animate things inside this image world, like in my original animation. This could be interesting both aesthetically and narratively, and would be intriguing to try and create an as realistic environment as possible.

Entering a Painting: I could photoshop or use 3D modelling techniques to recreate the image world of famous painters; namely Salvador Dali. I would take the surreal landscape and animate elements of it, such as making the clock drip onto the floor, the fire burn realistically, or the animals move around. By looking through the headset the viewer would be able to explore the painting as if it was a real place.

Question List
Now I have started making test pieces, I've been trying to see what makes some of them successful, and organise these components into a theme. From my success chart list I have already chosen production values that I want to work with, such as animated elements, electrical elements, or aesthetics, but from a thematic point of view the main things that come up are buildings, environments, minimalism, and 2D/3D crossovers. Considering all my production values and thematic points raises many questions for me to answer and think about when it comes to designing and making my final piece, and I have logged them here for reference as I go through my other processes.
When does interactivity become a game? When does an animation become an experience? When does an experience become theatre? When does science become art, and vice versa? What is the difference between interactivity and responsiveness? What is the difference between 2D and 3D? When does virtual reality become regular reality? What is the difference between something animated and an animation? At what point does something no longer count as minimalist? When does something go from an environment to a world to a universe? At what point does something go from organic to synthetic? What is the difference between virtual reality and augmented reality? When does an electronics piece become a robot? When does a robot become a computer? When does a concept become a virtual reality? In a 3D environment, how thin must something be to count as 2D? What dimension does 2.5D in after effects count as? When using someone else's software, can your work ever truly be yours? Whats the difference between 3D modelling and sculpture? How do you take a piece from something to view to something to experience? How do you physically present a virtual piece? Is the 'art' in the making of the piece, the piece itself, or the experience of the piece? Or all 3? What makes modelling different from drawing? Is wireframe modelling just sketching in more dimensions? Can virtual 3D really count as 3D when it is made and viewed entirely on a 2D screen? Can something really count as being made when it has no physical presence? Does animation actually exist or is it just an illusion? Can an illusion still count as something that exists? Just because our eyes perceive something as 3D does that make it 3D? Just because our eyes perceive something does that mean it exists? If the viewer controls what they and others see does that make them the artist? Can a realistic virtual environment count as a real place?
Photographic Inspiration
To continue my early exploration of imaginary environments, I have been taking photos of environments that are unfamiliar to me, such as the country side and other countries. This photography not only helped to inspire me about imagining new environments, but also allowed me to look at the world through the lens of a camera, helping me to notice things such as perspective and parallax and other things that can make things appear more three dimensional. Some of the photos were very successful and created very visually interesting pieces, but on the whole I am not planning on pursuing it as a medium in itself as I feel that I can connect with it in a way that helps me move onto other things but its not necessarily a deep enough connection to use it stand-alone.
...
...
First Test Pieces
.JPG)
As a starting point for my exploration into creating imaginary, interactive environments, I created some light-dependent light-up paper houses. I constructed the buildings out of thick card, and made small circuits on the roofs of the houses using conductive paint to connect a 9v power source to two coloured LEDs, a transistor, a resistor, and a light-dependent resistor that was concealed within the chimney. As the area becomes darker, the houses slowly light up until they glow brightly in complete darkness.
.JPG) I like the aesthetics of this piece, and its responsive, if not interactive, nature. Working with electronics in this way is interesting, but I feel that I could push the piece further and make it more complex by adding a coded element to it, increasing its interactivity. Also, I could try and think of ways to make it more immersive such as having larger pieces or creating an entire city made of them. I would also like to find a way to add a more animated side to the piece.
I like the aesthetics of this piece, and its responsive, if not interactive, nature. Working with electronics in this way is interesting, but I feel that I could push the piece further and make it more complex by adding a coded element to it, increasing its interactivity. Also, I could try and think of ways to make it more immersive such as having larger pieces or creating an entire city made of them. I would also like to find a way to add a more animated side to the piece..JPG)


For my second test piece I created a very simple virtual environment that used dual image 3D distortion so that it could be viewed through a 'google cardboard' headset. I used the simple modelling and texturing tools on the game engine 'unity' to create the world, added a first-person controllable player with two cameras set eye width apart, and then used the 'Dive' SDK (Software development kit) to add the distortion and the head tracking capability.
I like the virtual reality set up, and the partial interactivity, though am sure I can find a way to make it more interactive. The 3D imaging was very successful, but the aesthetics of the world definitely leave something to be desired. Again, I would like to add an element of animation to the development of this piece.

My third test piece is a stop motion animation made using two almost identical origami cranes. It follows the cranes journey from inside a cafe to out on the street where it eventually meets its demise. Unlike many stop motions, the crane is the only constant, with the background changing due to holding the crane up to have it 'floating', thus drawing complete attention to the bird.
It is aethetically pleasing and entirely animated, not leaving nay room for interactivity, responsiveness, immersiveness, coding, physical or virtual elements, or electrical elements. However it does explore the concept of the relationship between 2D and 3D due to the nature of origami being made out of a single, flat sheet of paper (or one per crane).

Success Chart
After reading through my project proposal, I came up with a list of elements that I would like to include in my final piece. By turning this list into a 'success chart' I am able to quickly tick off which elements each of my test pieces and ideas fulfil. I can then see which ones I could develop further to include more elements, which pieces and ideas I could 'merge' to fulfil more elements, and generally, which ones are bringing me closer to a final piece I am happy with and which ones I should abandon. One way of ensuring my final piece is successful is to ensure it ticks off most, if not all, of my chosen elements.

To help me keep a record of what challenges I have faced whilst creating my FMP, I have kept a log of each time I encountered a problem, and how I solved them. This will be useful in a number of ways: it helps me to see what I have learnt over the course of the FMP; it will help me solve future problems by seeing what aids me the most in solving different types of problems; it allows me to see what I tend to struggle with the most and therefore should try and become more proficient in; and, it allows me to see how long it takes me to solve problems and therefore will help me decide when I should give up and change plan so that I don't waste too much time being stuck. I will continue to update this log for the duration of the FMP.
| Date Encountered | Problem Description | Date Solved | Solution Description | Solution aid |
|---|---|---|---|---|
| 19/01/15 | Have an idea but no knowledge of how to do it/whether it is possible | 21/01/15 | Did some research and found an online tutorial of how to do what I want to do. Downloaded the game engine unity (free version) | |
| 21/01/15 | Unity did not have preloaded standard assets package as it should’ve come with, included first person character controller required to make a test piece for my project | 21/01/15 | Re-downloaded unity and installed standard assets package | Intuition |
| 22/01/15 | Can’t download unity onto university computers due to large download size and non-admin restrictions | 22/01/15 | Using own laptop for now. Asked technical team and found out that the university owns several unity pro licences for DCD students. | Common Sense |
| 22/01/15 | Official Google cardboard SDK requires unity pro account | 22/01/15 | Found a list of similar SDKs. Downloaded ‘Dive’ SDK that does not require unity pro account | |
| 23/01/15 | Unity’s 3D modelling capabilities are not good enough to be able to create an aesthetically pleasing map | 23/01/15 | Found a list of 3D modelling softwares that are compatible with unity. Downloaded Blender – free 3D modelling software that can be uploaded directly into Unity | |
| 26/01/15 | Don’t know how to use Blender | 03/01/15 | Found tutorials on basics of blender and how to model. Asked other students who have done 3D modelling before for tips | Blender Website, Peers |
| 16/02/15 | Couldn’t build map to load from unity onto android phone. Scripting errors prevented scene from being written. | 16/02/15 | Deleted non-working pieces of code | Trial And Error |
| 16/02/15 | Couldn’t load map from unity to android phone. “Android SDK root folder not found” | 18/02/15 | Downloaded Java SDK | Android Developer Website |
| 18/02/15 | “ | 19/02/15 | Installed required drivers for Android SDK through Java SDK | Android Developer Forum |
| 19/02/15 | Couldn’t finish installing Android SDK drivers due to insufficient disc space | 19/02/15 | Cleared laptop of all unnecessary old work and duplicates | Common Sense |
| 20/02/15 | Couldn’t load map from unity to android phone. “No Android device found” | 20/02/15 | Unlocked hidden developers options in phone. Turned on USB debugging | |
| 20/02/15 | “ | 21/02/15 | Used different USB cable | Intuition |
| 21/02/15 | Discovered there is no free way of loading my project onto IOS devices (I only own IOS devices) | 15/03/15 | Bought a broken Android Phone on eBay that will run apps | Spoke to tutor |
| 21/02/15 | My map will only load upside-down onto Android phone | 26/02/15 | Turned phone other way up | Common Sense |
| 26/02/15 | Don't know how to model in Blender | 26/02/15 | Watched online videos | Youtube |
| 27/02/15 | Can't import raw un-rendered blender files into unity through menu | 27/02/15 | Saved blender files in unity asset folder for automatic import | Unity website |
| 28/02/15 | When colouring objects in unity they all change colour rather than just the selected object | 01/03/15 | Created 2x2 pixel squares of colour on photoshop and imported them as textures into Unity | Intuition |
| 02/03/15 | Only know how to model 2D extruded disk-like objects | 03/03/15 | Looked at skyscraper modelling tutorial online | |
| 05/03/15 | Model appears as wireframe not solid object | 06/03/15 | Changed object display/shader method to solid shape | Trial and Error |
| 05/03/15 | Imported skyscrapers are missing roofs and backs | 06/03/15 | Went back to earlier version of model, made curves into 2D shapes before extruding rather than after | Trial and Error |
| 06/03/15 | Unity texturises too big and in the wrong place when using image rather than colour textures | 07/03/15 | UV mapped textures onto faces of objects in Blender before importing | |
| 06/03/15 | Hierarchy has too many objects and is confusing in unity | 06/03/15 | Created 'empty' objects to become parent objects to different sections of map to act as folders | |
| 07/03/15 | Unable to model very complicated objects in blender in timeframe to create desired aesthetic | 08/03/15 | Downloaded pre made assets to edit and use in my own way for trial pieces | Unity asset store, Google |
| 07/03/15 | Wii remote won't connect to computer | 07/03/15 | Change bluetooth settings on computer | Intuition |
| 07/03/15 | Wii parent script won't attach to object "Script not found" | 07/03/15 | Reimported script, renamed script file within unity to match name and class name | Intuition |
| 07/03/15 | Wii parent script won't run. "Wiimote already defined in global" | 11/03/15 | Redefined 'Wiimote' as 'wiiremote' | Intuition |
| 07/03/15 | Unity won't recognise wii remote | 07/03/15 | Downloaded 'Uniwii' plugin | |
| 08/03/15 | Unable to open .obj files in blender | 08/03/15 | Imported it as Wavefront file | |
| 08/03/15 | Unable to position first person character in place in imported map | 08/03/15 | Rescaled objects and re-set anchor points in object map to make it easier. Set both character and map to origin. | Trial and Error |
| 08/03/15 | First person character falls through imported object upon spawn in unity | 08/03/15 | Moved 'ground' block into spawn place underneath character | Intuition |
| 08/03/15 | Character falls through object when moving across map | 08/03/15 | Reimported object with colliders in place | |
| 08/03/15 | Can't figure out how to import path animated assets into unity without an animation controller | 10/03/15 | Adapted ideas to include only on-the-spot animation | Thinking |
| 09/03/15 | Character becomes stuck in some parts of mesh in test scene | |||
| 11/03/15 | Don't know how to animate in blender | 11/03/15 | Watched online tutorial on blender animation | Vimeo |
| 13/03/15 | Imported test animation in blender won't loop | 11/04/15 | Set loop time to positive in object's animation settings window, set root transforms to original | Trial and Error |
| 13/03/15 | Imported test animation in blender does not appear in right place once played | 11/04/15 | Change positional coordinates in Blender before import | Trial and Error |
| 14/03/15 | Don't know how to model rounded objects in blender | 23/03/15 | Found tutorial on blender wiki about mesh modelling | |
| 15/03/15 | Scenes lost all assets after re-ordering within finder | 15/03/15 | Restored backup. Re-ordered all files from within unity GUI instead | Intuition |
| 16/03/15 | Can't upload models directly from blender to sketchfab | 16/03/15 | Export models as wavefront .obj and upload from there | Trial and Error |
| 17/03/15 | Models uploaded to sketchfab lose texture | |||
| 20/03/15 | Can't get autowalk script of Dive SDK to work | |||
| 23/03/15 | Can't line up background image views correctly | 23/03/15 | Switched front view image to right view, switched left view image to front view to realign axis' | Intuition |
| 23/03/15 | Unable to select individual faces on mesh in blender | 23/03/15 | Changed selection choice to face | Intuition |
| 23/03/15 | Unable to reconnected subdivided surfaces adjacent to subdivided extrusions on blender mesh | 23/03/15 | Extruded face an extra time and dissolved edges on unwanted subdivisions | Trial and Error |
| 25/03/15 | Can't see through one side of model in order to model the other side | 25/03/15 | Selected unwanted parts of model and hid them whilst editing the rest | |
| 25/03/15 | Unable to create triangular subdivisions on mesh in blender | 25/03/15 | Connected unconnected points by creating 1D faces between points, then 2D faces between 3 new points | Trial and Error |
| 25/03/15 | Subdivision surface modifier creates unwanted shapes in blender | 25/03/15 | Remove modifier and create a greater number or manual subdivisions | Trial and Error |
| 27/03/15 | Custom modelled game objects cannot be affected by wind zones and automatic physics in unity | 29/03/15 | Use unity tree generator to make affected trees and make custom leaves with alpha channelled textures to create the right look, or animate objects in blender before importing | Intuition |
| 28/03/15 | Cannot switch between scenes without increased user input and coding | 29/03/15 | Save scenes as separate .apk's that users can select before viewing | Intuition |
| 30/03/15 | Can only build and test one .apk per unity project | 31/03/15 | Create scenes in separate unity projects and build from there, allowng multiple test files on phone at one time | Trial and Error |
| 31/03/15 | Cannot use animated GIFs as textures in unity | |||
| 02/04/15 | Level 6 subdivision surface modifier and renderer on all child objects crashes blender | 05/04/15 | Use decimation modifier to reduce number of faces | |
| 03/04/15 | Highly subsurfed object's file size is too large to import into unity - "fatal error - Could not allocate memory - system out of memory! Trying to allocate1342177280B with 16 alignment..." | 08/04/15 | Remake asset with smaller level of subsurf and only subsurf necessary components to reduce file size and reimport | Intuition |
| 05/04/15 | Unity made game objects cannot use UV texturing | 06/04/15 | Texture objects in blender first, or create 'perfect fit' textures in photoshop for unity made objects | Intuition |
| 08/04/15 | Model faces are only solid from one side once imported into unity so when viewed form a certain angle have a see-through panel | |||
| date | problem | date | solution | method |
Initial Planning - Flow Chart
Now I have some idea of what form I would like my project outcome to take, I need to start planning the steps in order to reach that outcome. However, at this early stage I am not quite ready to plan my steps exactly to a time limit as I still need some level of fluidity to my process. Because of this, I have created a flowchart with multiple paths that all lead to a completed project I will be happy with.
On my flowchart I have created a range of different points, outlined in my key. I have instruction points that must be followed if reached, and these only have one outcome - usually leading to a test point: one that requires me to assess my work before continuing and has multiple outcomes leading off of it. This gives me the opportunity to analyse and evaluate my work, allowing me to adapt my project to keep it on a successful path. I have question points which add another element of fluidity to my plan without separate testing, which also have multiple outcomes. I have time checks to remind myself to keep my work on schedule and to make sure I keep expanding my project right up to its limits if I have time left over even after reaching my goals, and urgent points to ensure I can work effectively to fix problems under pressure. Finally, I have an 'abort mission' point that has multiple paths leading to it from early on in the flowchart allowing me to go for an ambitious project that I have no knowledge of without fear as I have planned in time for failure and for needing to rethink my ideas.
Project Proposal First Draft (No more than 30 words)
This is the first draft of my project proposal, in which I was challenged to write no more than 30 words per section. This has helped me think about the bare bones of my ideas, whilst keeping it very relevant and succinct. It also allows me scope to change my ideas and keep it fairly broad right now as I am unable to go into too much detail. This first draft has shown me that I am on the right track, and need to start thinking in detail about what exactly I would like to create as part of my FMP.
Section One:
So far I’ve been exploring different animation techniques, and tried out a bit of interactive work. For my FMP I hope to merge these ideas together.
Section Two:
I aim to produce an imaginary environment, hopefully with a level of interactivity and/or virtual reality. I will use some/all of the following: animation, coding, dual image 3D, and electronics.
Section Three:
I want to create a fully immersive experience that can merge together media and styles. I could use user surveys to measure my success, and record my participants’ reactions.
No comments:
Post a Comment